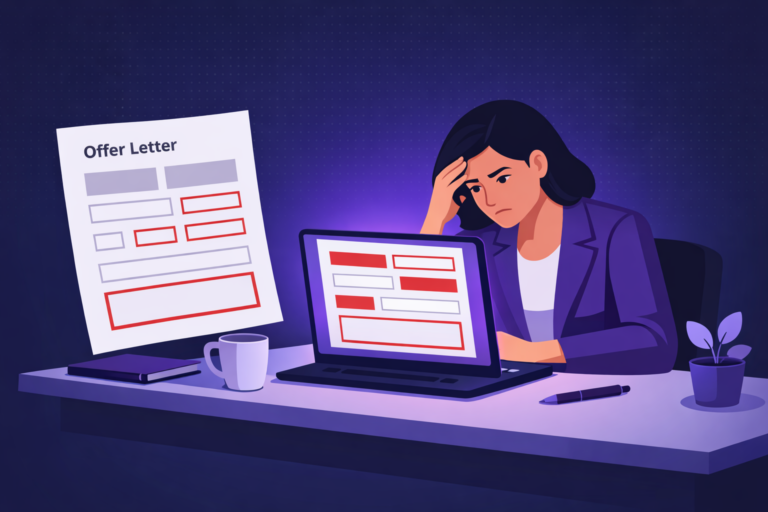
Getting iCIMS onboarding setup right is one of the most impactful things a TA or HR ops team can do for the new hire experience. And yet, it’s one of the most commonly misconfigured parts of the entire iCIMS platform. New hire tasks don’t appear. I-9 forms throw errors. The HRIS never receives the new hire record. The new hire logs into a portal with a confusing checklist and no idea what to do first.
We’ve helped dozens of organizations configure iCIMS Onboard as part of our iCIMS consulting services, and the problems we see are almost always the same. Most of them come down to skipping key configuration steps, misunderstanding how iCIMS Onboard relates to the ATS, or not testing the full experience before going live.
This guide covers the full iCIMS onboarding setup process, the five most common post-go-live problems, and how to make sure your configuration actually holds up when real new hires hit the system.
🎯 What Is iCIMS Onboard (and How It Differs from the ATS)
iCIMS Onboard is a separate module within the iCIMS Talent Cloud. The ATS handles recruiting, from requisition creation through candidate screening, interviewing, and offer acceptance. iCIMS Onboard takes over once a candidate accepts an offer and becomes a new hire. It manages the post-offer workflow: collecting paperwork, completing compliance forms, assigning orientation tasks, and syncing new hire data to your HRIS.
The two systems share candidate and job data but have entirely separate configuration spaces. This is the single most important thing to understand before you start. Configuring iCIMS Onboard is not the same as configuring a workflow in your ATS. It has its own task library, its own workflow profiles, its own portal, and its own permission model.
iCIMS Onboard also has a dedicated new hire portal that is separate from the candidate-facing career site. New hires log in to a different URL and experience a branded portal where they complete their assigned tasks, sign forms, and track their progress before their start date.
✅ Prerequisites Before You Start
A failed iCIMS onboarding setup usually traces back to skipped prerequisites. Before you configure a single task, confirm all of the following:
- iCIMS Onboard is licensed. Check with your iCIMS account team. Onboard is a separate add-on.
- You have admin access to both the ATS and the Onboard configuration space. These are different permission sets. Not every iCIMS admin has Onboard admin rights by default.
- You have your organizational chart mapped. You need to know which departments and job types exist, because they will each potentially need their own Onboarding Workflow Profile.
- Your ATS hired status is defined. The specific ATS status that triggers onboarding launch needs to be agreed on before you start. Different organizations use different status names. Get alignment before configuration begins.
- Your HRIS integration credentials are available. If you plan to push new hire data to Workday, ADP, or UKG at the end of the onboarding workflow, your HRIS admin needs to be in the room.
- Your electronic forms are confirmed. Know which forms you need: W-4, I-9, direct deposit authorization, handbook acknowledgment, BYOD policy sign-off, and so on. Each form will be its own task or electronic form configuration.
📊 Step 1: Build Your Workflow Task Library
The Workflow Task Library is the foundation of iCIMS onboarding setup. Think of it as a master catalog of every task that could ever be assigned during an onboarding workflow. You build the library once and then pull tasks from it when assembling individual workflow profiles.
Tasks in iCIMS Onboard fall into several functional categories:
| Task Category | Who Completes It | Examples |
|---|---|---|
| New Hire Task | The new hire (in their portal) | Complete W-4, sign handbook, upload ID photo, watch welcome video |
| Electronic Form | New hire and/or HR | I-9, W-4, direct deposit authorization, state tax forms |
| HR Admin Task | HR team member | Verify I-9 Section 2, enter benefits enrollment, confirm start date in HRIS |
| Hiring Manager Task | Hiring manager | Confirm equipment order, schedule orientation, introduce to team Slack |
| IT/Systems Task | IT team | Provision laptop, create email address, grant application access |
Each task you create in the library gets a name, a description, a task category, an assignee type, a due-date rule (e.g., “5 days before start date”), and optional dependencies on other tasks. Build every task you might ever need in the library first, even if not every workflow profile will use all of them.
Task dependencies are powerful but frequently misconfigured. A dependency means Task B cannot start until Task A is marked complete. The most common dependency chain is: “Complete I-9 Section 1” (new hire) must be complete before “Verify I-9 Section 2” (HR) can begin. Set these dependencies carefully and test them. A broken dependency can lock a new hire out of their checklist entirely.
For teams building custom forms beyond W-4 and I-9, review our guide to iCIMS iForms setup. Custom iForms can be attached to tasks as electronic form completions within the onboarding workflow.
🔥 Step 2: Create Onboarding Workflow Profiles
An Onboarding Workflow Profile is the assembled sequence of tasks that a specific population of new hires will complete. You pull tasks from the Workflow Task Library and arrange them into a profile, set the order and timing, and define the rules for who gets which profile.
Most organizations need more than one profile. Common examples:
- A Corporate/Exempt profile for salaried employees with benefits enrollment, laptop setup, and a more involved orientation sequence
- A Hourly/Nonexempt profile with a shorter checklist focused on I-9, W-4, and direct deposit
- A Contractor profile with a different NDA, no benefits enrollment, and limited IT provisioning
- A Part-Time profile that skips 401(k) enrollment and other full-time-only steps
Profile mapping is where a lot of teams make their first mistake. You need to define the rule that assigns the correct profile to each new hire. That rule is typically driven by job type, department, employment classification, or a combination. Spend time on this mapping before you configure the profiles. If the mapping logic is wrong, new hires get the wrong checklist, and you’ll be chasing down individual records to manually reassign tasks after go-live.
⚠️ Step 3: Configure the ATS-to-Onboard Handoff
This is the step that fails most often. The ATS-to-Onboard handoff is the moment when a candidate’s ATS record triggers the creation of an Onboard record and the launch of an onboarding workflow. If this trigger is misconfigured, onboarding never starts, and your new hire shows up on Day 1 with nothing to do in the portal.
The handoff is driven by a specific ATS status, typically a “Hired” status in your recruiting workflow. When a candidate reaches that status, iCIMS Onboard should automatically create the onboarding record and begin the workflow. Here is what you need to verify:
- The trigger status is correctly identified. Different organizations customize their ATS statuses. Confirm exactly which status should fire the onboarding trigger in your system. If you have multiple hired statuses (e.g., “Offer Accepted” vs. “Hired – Start Date Confirmed”), choose one and document it clearly.
- The data fields transfer correctly. The new hire’s start date, job title, department, location, and employment classification all need to pass from the ATS record to the Onboard record. A missing start date is the most common single cause of task scheduling failures in iCIMS Onboard.
- The Onboarding Workflow Profile assignment fires correctly. The trigger needs to not only create the Onboard record but also apply the right workflow profile based on the new hire’s attributes.
If you’re running into issues with iCIMS automation rules in the ATS side of this handoff, our guide to iCIMS workflow automation examples covers the different automation types and how they interact with status changes.
🎯 Step 4: Set Up the New Hire Portal
The New Hire Portal is where new hires actually experience iCIMS Onboard. It’s a branded, task-driven interface that shows them what to complete, tracks their progress, and houses the electronic forms they need to sign. A well-configured portal makes onboarding feel organized and professional. A poorly configured one makes new hires call HR asking what they’re supposed to do.
Portal setup involves two distinct layers: functional configuration and branding.
Functional Configuration
On the functional side, you need to confirm that the tasks assigned to new hires in their workflow profiles are visible in the portal, that form links open correctly, and that the task progress bar reflects completion accurately. The progress bar is driven by the count of completed tasks on the Person profile’s Onboard Status tab, so if tasks are not appearing there, they won’t appear in the portal either.
Portal Branding
iCIMS allows you to customize New Hire Portal pages with your organization’s logo, color palette, welcome messaging, and video content. Organizations that invest time in portal branding report meaningfully better new hire satisfaction scores in post-onboarding surveys. The portal does not need to look like a generic HR system. Use your company’s visual identity.
📊 Step 5: Connect Your HRIS
The final configuration step in iCIMS onboarding setup is connecting iCIMS Onboard to your HRIS or payroll system. This integration pushes new hire data from iCIMS to your HRIS once the onboarding workflow reaches a defined milestone, typically when all required forms are complete or when the new hire’s start date is confirmed.
iCIMS integrates with major HRIS platforms including Workday, ADP Workforce Now, UKG, and others. We have detailed setup guides for two of the most common:
- iCIMS Workday integration setup: covers the three connector options, prerequisites, bidirectional field mapping, and fixes for common sync problems
- iCIMS ADP Workforce Now integration: covers the connector types, field mapping rules, and the most common post-go-live sync failures
Regardless of which HRIS you use, the critical step before go-live is a complete field mapping review. Map every data field that iCIMS Onboard will send to your HRIS and confirm that the field exists in the destination, that the format matches (date formats are a frequent source of errors), and that required fields in the HRIS are not left blank on the iCIMS side. A single missing required field will cause the entire new hire record to fail to sync.
🔥 5 Most Common iCIMS Onboarding Setup Problems (and Fixes)
Even well-planned iCIMS onboarding setups run into problems after go-live. Here are the five we see most often and exactly what causes each one.
💡 When to Bring In a Consultant for iCIMS Onboarding Setup
iCIMS onboarding setup is manageable for an experienced iCIMS admin working on a straightforward implementation with one or two workflow profiles and a standard HRIS integration. But there are clear signals that it’s worth bringing in outside expertise.
Bring in a consultant if:
- You’re standing up iCIMS Onboard for the first time with no prior configuration documentation
- You need four or more distinct workflow profiles for different employee populations
- Your HRIS integration involves a non-standard field structure or a custom connector
- You’ve already gone live and new hires are experiencing problems you can’t diagnose
- Your team does not have a dedicated iCIMS admin with Onboard configuration experience
- You’re migrating from a different onboarding system and need to rebuild your workflow library from scratch
Our iCIMS managed services team works with organizations on ongoing onboarding configuration support, including post-go-live optimization and new hire experience audits. For a one-time setup project, a fixed-scope engagement is often the most efficient path.